Introduction: Porcelain Tile Installation -The Expert’s Guide
Porcelain floor tile installation is both an art and a science, offering a transformative impact on any space. This guide delves into the nuances of fitting porcelain tiles, ensuring that even beginners can achieve professional results. This guide will help you through the entire process, from setting up the porcelain tile to completing the installation. You can confidently take up your home improvement project towards the end.
Step 1: Prepping Your Space for Porcelain floor Tile Installation

- Removing Existing Flooring: The first step in porcelain tile installation is to clear the area. Preparing the subfloor is of extreme importance. In the case of an old tile floor, the old tile must be chiselled out, and a floor scraper must be used to remove the tile mortar. Proper safety gear like eye protection and a safety mask must be worn while undertaking this process to avoid any dust from getting in the eye.
- Ensuring a Level and Firm Floor: An essential aspect of porcelain tile installation is to start with a level base. If there are any low spots, you can fill them with a levelling compound to ensure your floor is perfectly prepped.
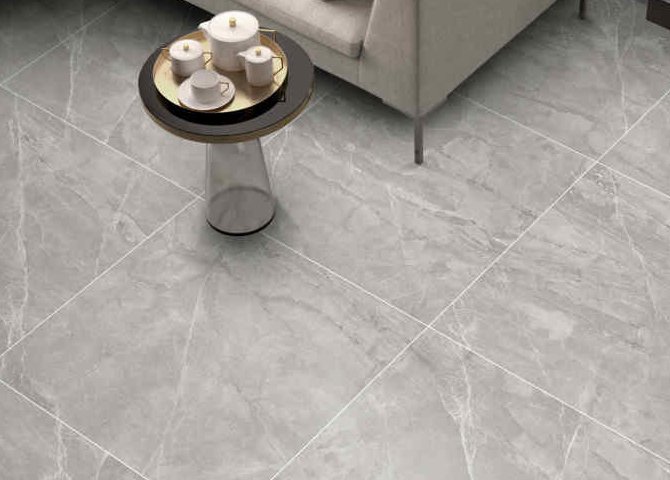
- Selecting and Mapping Out Your Tile Pattern: The next step in this process is selecting and planning your tile layout; this is a vital step in achieving an aesthetically pleasing finish.
Step 2: Porcelain floor tile installation – Process

- Cutting the tile membrane: Start the tile installation process by laying out the tile membrane with the fleece side down, then mark the subfloor at the edges of the membrane, demarcating the area where the thin-set is to be spread.
- Preparing the Thin set: The next step in the tile installation process is to prepare the thin set in a bucket. Check the consistency by running through your trowel. Let it stand for 10 minutes after mixing to activate the chemicals. Now spread evenly on the thin-set with the trowel, covering the entire space. Roll the tile membrane out and press it down into the thin set. Continue working in sections, applying mortar and then membrane.
- Mortar Test: At the beginning of porcelain tile installation, you must test to ensure the consistency of the mortar. Start by spreading the thin set on a small area and placing a tile over it. Then, apply a little pressure. Now, pull up the tile and check the back side of the tile. If it’s completely covered in thin-set, then you can go ahead and continue with the process else, readjust the consistency as needed.
- Marking the starting point for tile layout: Mark a guideline for the tile to make sure the tile pattern is evenly centred. Measure the walls in the room with a tape measure to find the midpoint. Snap a chalk line between marks from two opposite walls.
- Dry Fitting Your Tiles: Dry fitting your tiles is of utmost importance. Before any permanent placement, dry-fit your tiles using tile spacers to ensure sufficient expansion gaps. Leave a 1/4-inch gap along the outside edges for expansion.
- Laying out the tiles: Re-check the mortar and lay your first tile along the reference line—place tile spacers on either side of the tile. For every couple of tiles, check for a thin set on the back of the tile; apply more if required. Now, continue setting in the tiles by aligning the corners and edges.
- Levelling the Tile: Clean and level the tiles as you go. Use an extended or 2 x 4 to check for high spots and set them in with a rubber mallet. Clean any extra thin-set on tiles with a wet cloth for a seamless and clean look.
- Measure and Cut Tiles: Measure and cut the tiles as required to be placed along the edges of the wall. Once the laying process is finished, let the thin-set dry for 24 hours.
- Applying Grout: After the thin set has dried, remove the tile spacers, apply the grout with a rubber float, and spread it diagonally across. Remove the excess with a grout float. After 30 minutes, wipe the grout lines with a wet sponge to avoid grout haze.
- Setting the Grout: Allow the grout to set in for 72 hours. Mist it twice daily to cure it, and do not walk on it slowly. Fill in any excess gaps between the tile and the wall with caulk to prevent water from getting in.
- Sealing the Grout: After the grout has set in. Clean the surface and apply a silicon-based tile sealer to protect the surface. Your space is now ready to be installed with baseboard.
Conclusion

This guide outlines the porcelain tile installation process, from prepping the subfloor to applying the sealer. Emphasizing preparation, proper material handling, and precise tile placement ensures that even beginners can achieve a professional-looking finish. Following these steps, one can expect a durable and aesthetically pleasing porcelain tile floor, completing a transformative home improvement project with confidence and expertise.
If you’d like to check our porcelain tiles, you can click here.


