From the Ancient Roman Baths to modern-day kitchens and bathrooms, mosaic tiles, with their intricate designs and vibrant colours, versatility, and endless aesthetic appeal, have been beautifying spaces for centuries. These tiles are often made of porcelain, stone or glass, creating intricate designs for that Lux feel. Today, in this space, we talk about these tiny wonder tiles and walk you through every step of installing the mosaic tiles.
Section 1: Getting Started – Mosaic Tile Installation
Choosing the Right Mosaic Tiles for Your Project.
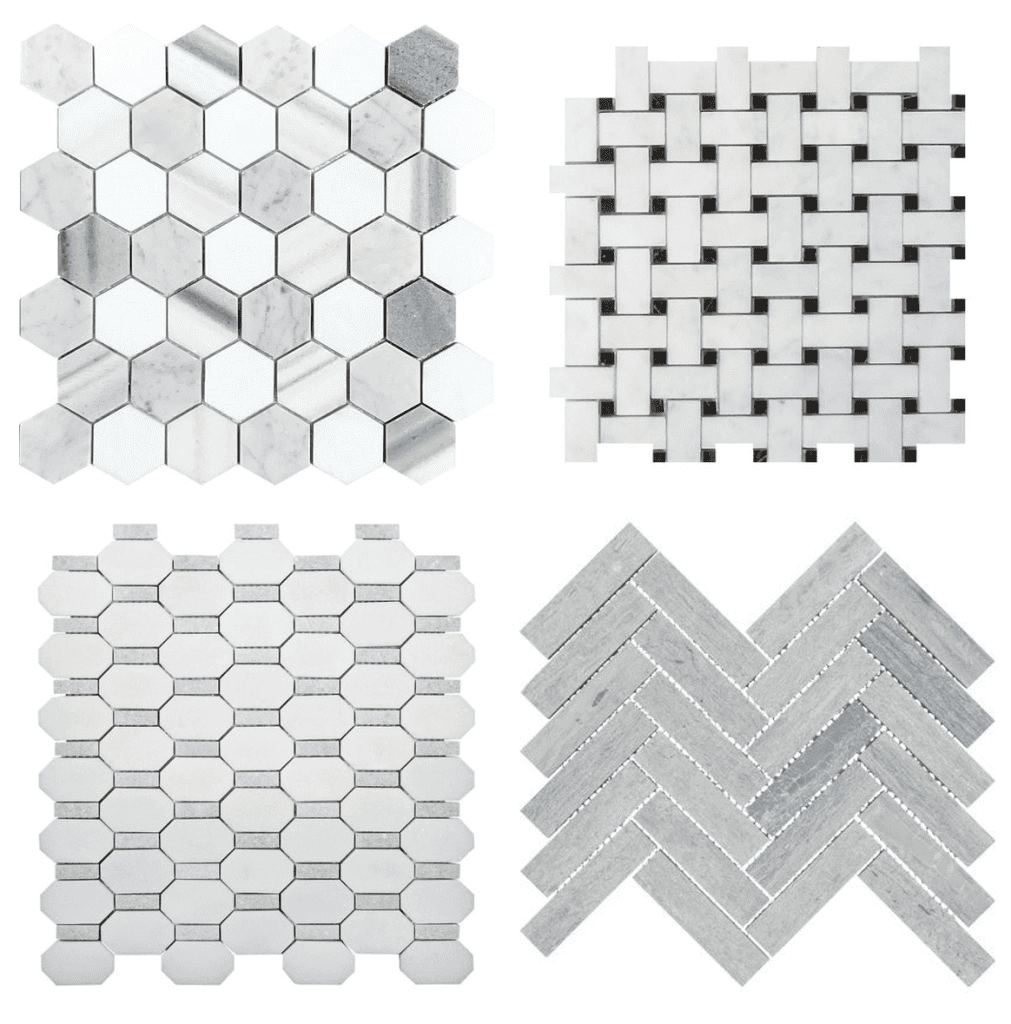
Mosaic tiles can be used on various surfaces like floors, walls, and countertops to create beautiful patterns. Mosaic tiles come in multiple tiles attached to a single mesh fibreglass, making the installation process more manageable. When taking up a tiling project, selecting suitable mosaic tiles is very important to achieving both aesthetic appeal and functionality. Ceramic mosaics have a classic look and are easy to maintain; they are ideal for areas that require regular cleaning, like kitchens and bathrooms. Glass tiles, on the other hand, offer a luminous quality that can brighten any space and are ideal for creating a statement backsplash or an accent wall.
For a more natural and rustic charm, stone mosaic tiles, such as slate, marble, or travertine, can be used to bring in an element of the outdoors inside and are excellent for areas like the entrance or garden pathway. Another consideration when choosing mosaic tiles, apart from the material, is the area of application. Wet areas demand non-porous and slip-resistant tiles, while more porous varieties in luxurious textures and colours can be applied in living areas. The aim is to balance the practical attributes and aesthetic essence of the space to create a holistic environment that reflects your taste and style.
Section 2: Preparation
Preparing Your Surface for Mosaic Tile Installation.
Proper surface preparation is crucial to a successful mosaic tile installation. The installation surface needs to be carefully assessed since different substrates may require different preparations. The subfloor must be smooth and uniform. Check the surface with a straightedge or spirit level. Sand down high spots, and in case there is a dip in the wall, flatten the surface with a layer of setting-type joint compound on it. For Floors and walls in wet areas, use a thin set instead of a joint compound. Clean the area well, removing all dust and grease. Cement board can be applied to a plywood subfloor or directly against wall studs. Once the surface is prepped, the mosaic tile installation can begin.
Plan the Tile Layout
Measure the length and width of the area for mosaic tile installation. Always take into account an additional 10% for tile wastage. You can use grid paper to scale your layout. Visualize your design by laying out tiles on the floor for a dry run to ensure you like the pattern. Determine the halfway point and mark this on each of the four walls. Snap a chalk line in each direction to draw intersecting perpendicular layout lines. Starting at the center of the tile field lets you install full sheets of mosaic tile until you reach the edges of the field. At the edges, cut the mosaic tile sheets to size.

Step by step guide
Laying the first sheet :
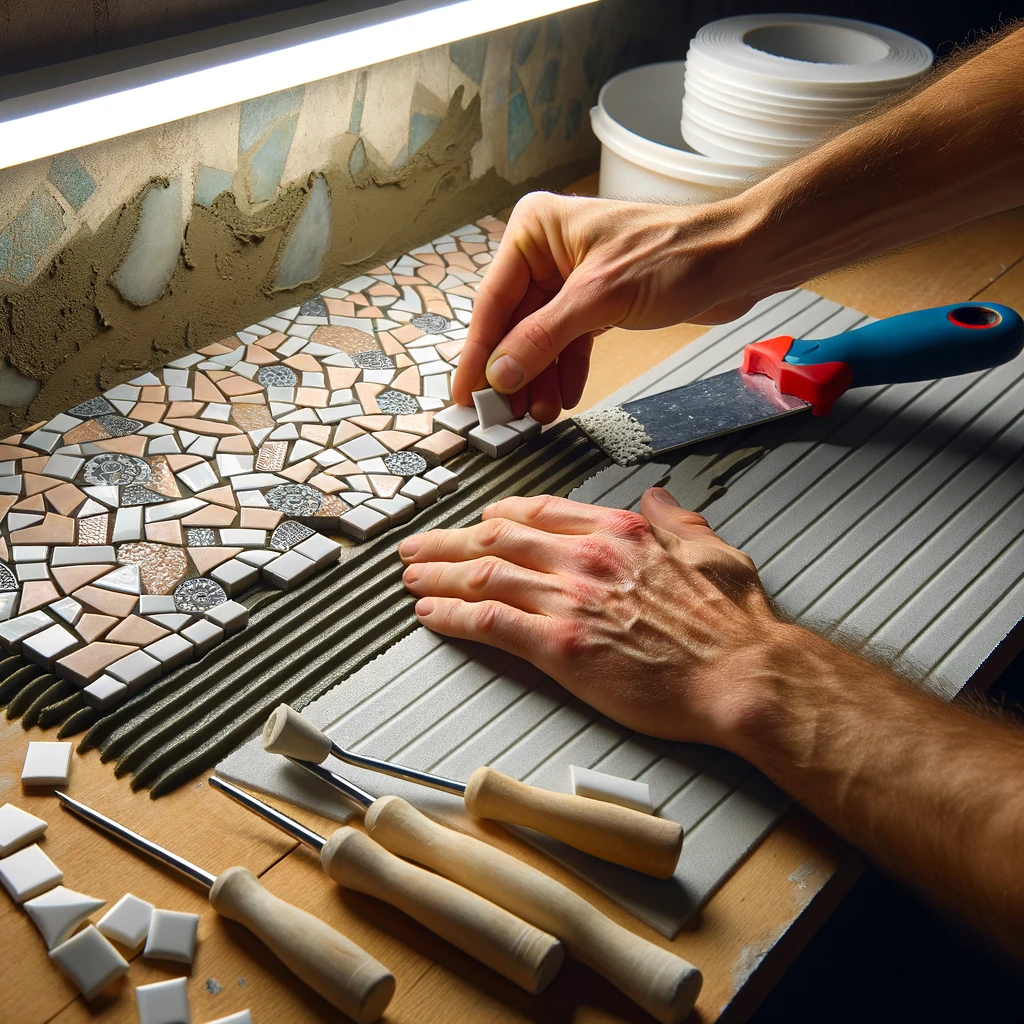
- Prepare the Mortar: Mix thin-set mortar according to the manufacturer’s instructions to a peanut butter-like consistency. For smaller projects, pre-mixed adhesive is a convenient option.
- Apply the Setting Material: Apply the thin-set mortar at the center of the layout line with a notched trowel. Apply thin-set in small square, workable sections of 2-3 feet squares.
- Place the Tile Sheets: Start by placing your first mosaic tile sheets on the thin set aligned at the center. Press them evenly into the thin set. Continue the laying process using spacers, ensuring each sheet is level with the next. If the tile sheets begin to form waves or ripple on the surface, take a plywood piece and rubber mallet and tap them into place. Once you get to the edges, install the trim or accent tile pieces like bullnose edging, cover tiles or baseboard tiles.
- Final Adjustment: Before the adhesive sets, adjust individual tiles to avoid unevenness or fit-around obstacles. A pair of tile nippers can be handy for making precise cuts. After the mosaic tile installation, set it for 24-48 hours before adding grout.
- Application of Grout: Choose a grout colour that compliments your tile. Apply the grout with a rubber grout float into the spaces between the tiles. Take a decent amount of grout on your float, then spread it over the tile. Holding your float at a 45-degree angle, force the grout into all joints and seams. Alternate the direction to ensure the grout has equally filled all the joints.
- Clean and Seal: Scrape off any excess grout with the edge of the float. Once the grout has cured, use a damp sponge to clean any grout haze. Apply a sealant to the grout lines for added protection, if required.
Mosaic Tile Installation for Backsplashes
Nuanced Techniques for Backsplash Mosaic Tile Installation
Installing a mosaic tile backsplash can be transformed into a state-of-the-art design with nuanced techniques. These techniques elevate the aesthetic appeal and significantly help with working around tricky areas like outlets and corners. Here’s how you can incorporate these advanced techniques into your project:

1. Custom Patterns
- Unique Layout: This is essential because you can create a plan with a distinctive pattern that suits your design. The best way to do this is by using software to visualize the arrangement.
- Choosing the Right Tiles: The key here is mixing colours, shapes, textures, patterns and more. You will notice the difference and carve a distinctive look by doing this.
2. Working Around Outlets and Switches:
- Accurate Measurement: This aspect is crucial because it lets you plan the layout. The fixtures should be precisely located, well-measured, and transferred to the design layout.
- Cutting Tiles: This technical aspect is crucial to creating a good design. To do so, you will need to choose the right tool. We recommend using it correctly by cutting circularly.
3. Steering Corners and Edges
- Fixing Corners: In this step, you can provide a seamless transition on the corners. The best practice is cutting the tiles at a 45-degree angle for a clean look.
- Edge Treatment: An excellent way to treat the tiles is to keep the edge trim frame in mind and protect the edges from chipping.
4. The key is in the details
- Layering Tiles: To create a good design, use the tile at various levels or overlap them in certain areas. This is usually recommended in monochromatic schemes, creating interest and adding dimension to your backsplash design.
- Colour for the grout: This detail revamped the backsplash or your tile. You can use different contrasts that make your backsplash luxurious and dramatic.
These advanced practices are crucial to having an artistic feature in your space by implementing a regular mosaic tile installation. However, these practices require expertise, precision, knowledge and attention to detail. This can result in a fantastic backsplash reflecting your vision and style.
Tips for Maintenance Mosaic Tiles
If you want to conserve your appearance and have it for a long period, these tips will be helpful for you.
1.Create a Routine for Tile Maintenance
- Clean Tile Regularly: Clean the tiles at least four times per week; also, choose a good and soft cloth or sponge and use warm water. Clean carefully and avoid strong cleaners such as bleach. This can damage your tile.
- Spot Cleaning: When you are with your family and enjoy a great moment, accidents such as spilling water or other substances can sometimes occur. In this case, you need to act quickly to avoid long-term stains. Our recommendation is to clean the spill with a wet cloth, and if the spot is difficult to delete, you can use baking soda and water to delete it.
2.Grout Maintenance:
- Clean the grout: We recommend using a soft brush and grout cleaner. Keep in mind and avoid severe scrubbing because it can damage the grout.
- Periodic Sealing: Grout is an essential part of avoiding water penetration. Therefore, you must seal the grout regularly (1 time per year)
3. Professional Deep Cleaning:
- Deep cleaning: Hiring a professional deep cleaner two times per year. This is going to help you significantly in maintaining your mosaic tile. You cannot clean some areas because many mosaic tiles have intricate mosaic designs.
Conclusion
Mosaic Tile Installation requires discipline, expertise and creativity. You will have durable mosaic tile if you focus on the correct approach and attention to detail. Otherwise, you will have to replace it multiple times. We hope that this guide can be helpful for your tile installation.
If you have questions, please contact us at 604 440 2171 or visit our showroom in Vancouver.







One Response
Hello everyone, it’s my first go to see at this web page,
and article is actually fruitful in favor of me, keep up
posting these content.
My web blog discord copy and paste fonts