Starting a home renovation by going for ceramic tiles installation is an interesting yet challenging experience. In this useful guide “How to Install Ceramic Tile,” we give step-by-step instructions to improve your space with this sturdy, trendy floor alternative. Ceramic tiles come with a lot of benefits like a long life, design flexibility, and the power to enhance any room’s looks. Whether you’re a looking to do a DIY project or go for a professional approach, this guide’s goal is to prepare you with the necessary information and skills to revamp your home with ceramic tile floors’ allure and elegance.
So, here is your guide on how to Install Ceramic Tile.

1.Beginner’s Guide: How to Install Ceramic Tile
Installation of ceramic tile requires the right tools and supplies. In this guide we will discuss everything you need for your tile project. The guide braces you for each part of the process and have the correct to start a job that can take work and time.
Tools:
- Measuring Tape: To start the project you need a good measuring tape to take measurements.
- Tile Cutter: A tile cutter is required for cutting tiles to a precision.
- Notched Trowel: It helps in applying the mortar evenly.
- Rubber Grout Float: A rubber grout float is required for applying and spreading the grout.
- Level: After laying the tiles, a level is used to ensure tiles are laid flat and even.
- Tile Spacers: Tile Spacer helps in maintaining even spacing between tiles.
- Sponge and Bucket: Once the grout and mortar a spread out, excess grout and mortar can be removed with the help of sponge.
- Safety Gear: For protecting yourself, while taking up the project a safety gear is must. Use goggles and gloves for protection.
Materials:
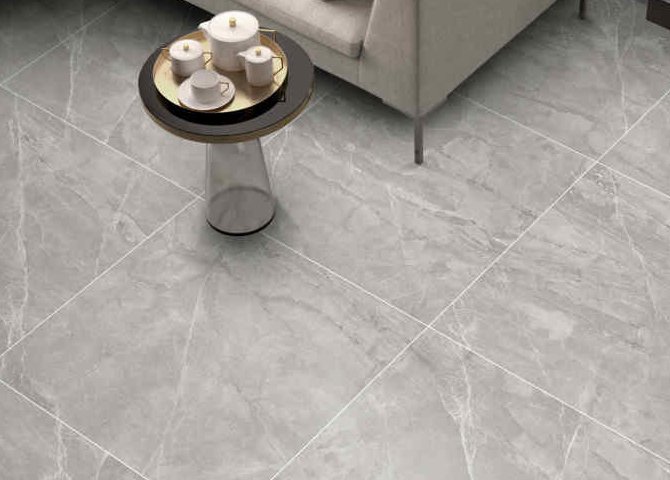
- Tiles: Choose a style and material suitable for your space (e.g., ceramic, porcelain).
- Mortar: The adhesive for attaching tiles to the floor.
- Grout: Pick the right colour to fill the spaces between tiles.
- Underlayment: Before you start laying the tiles, an underlay is required to provides a smooth, level surface.
- Sealant: Finish the process by applying sealant to protect porous tiles from moisture and stains.
When you’re figuring out how to install ceramic tile, picking top-notch materials that fit your project is vital. For example, porcelain works better in busy areas, while ceramic could be an excellent choice in areas which have low traffic, on accent walls etc. The function of a room is a defining factor for picking the right tile.
Remember, the right tools and materials make the job easier and ensure a long-lasting and visually appealing finish.
2. Planning Your Ceramic Tile Installation for an Easy Process
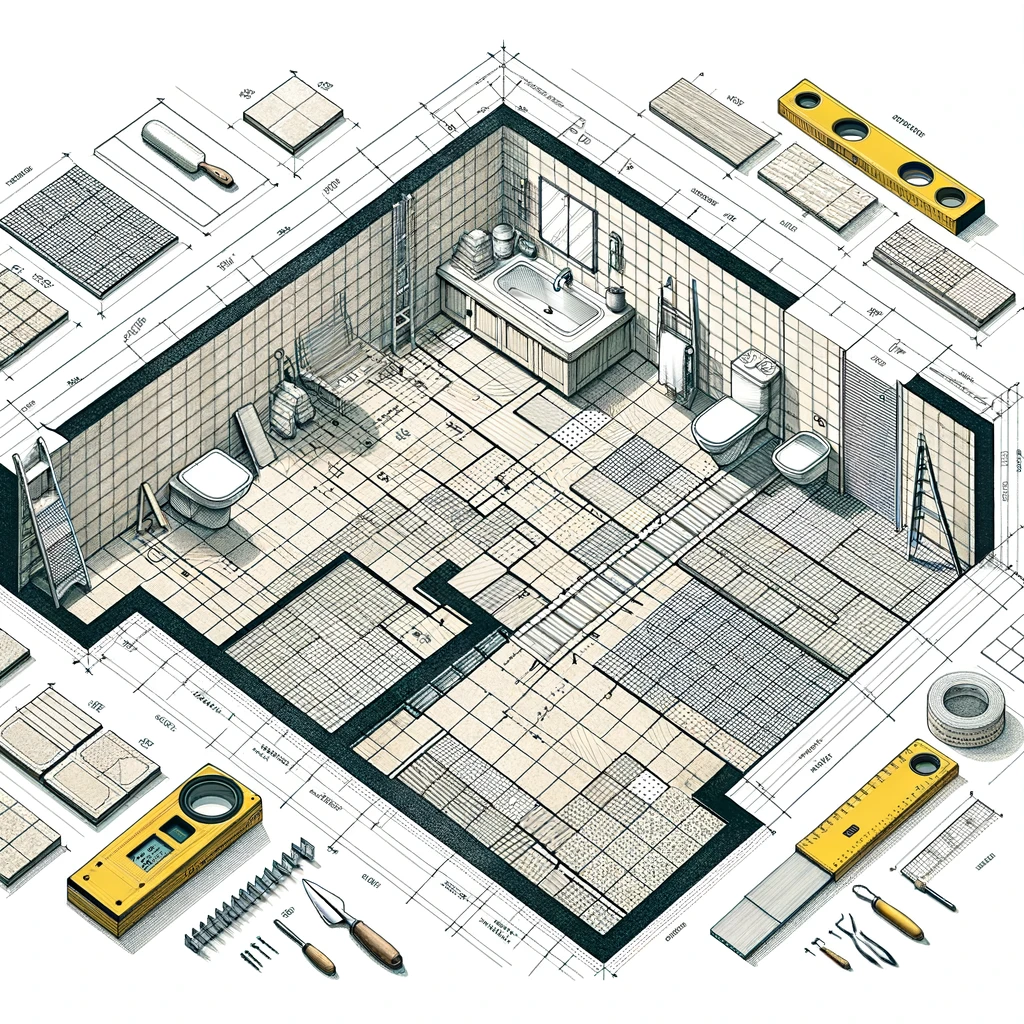
Planning your ceramic tile installation is an important aspect of your DIY project, as it will define the success and the proper outcome. This phase involves several key considerations:
- Measuring the Space: The first step involved in planning for your ceramic tile installation is to measure the area where tiles needs to be installed. This is important step as it helps in calculating the quantity of material required. This can further help in planning the layout in a fashion that you can minimize waste and ensure a symmetrical finish.
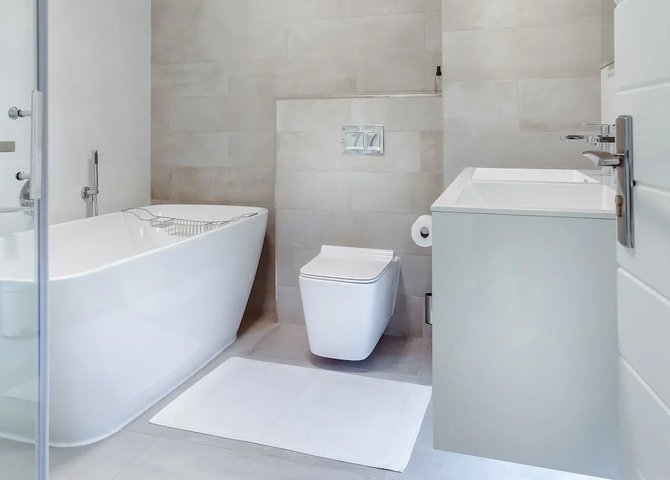
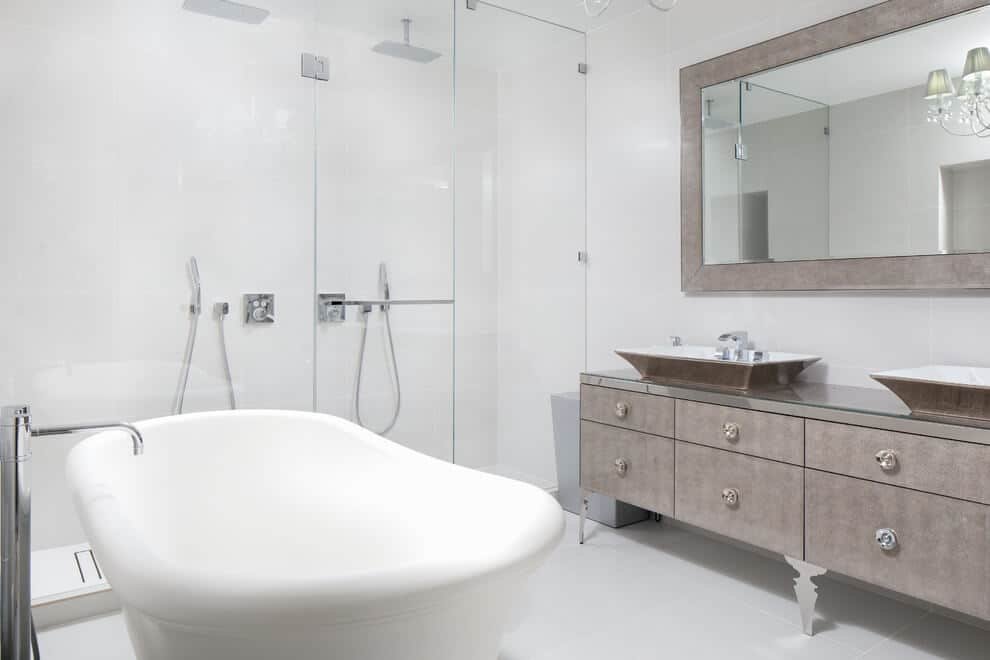
- Choosing the Tiles: Consider the utility of the space. For instance, bathrooms and kitchens will require water-resistant and anti-skid tiles, while in living areas you can get more creative and opt for textured tiles or handmade tiles to do up feature walls etc.
- Calculating Material Quantity: Based on measurements, calculate the number of tiles needed, including 10% for wastage. Also, estimate the amount of mortar and grout required.
- Tools Preparation: Ensure you have all necessary tools, such as a tile cutter, level, notched trowel, and grout float. Having everything on hand avoids delays during the installation process.
- Layout Planning: Plan the tile layout. This might include deciding on the orientation and pattern of the tiles. Use a chalk line or laser level to mark guidelines.
- Dry Layout: Before installing, do a dry layout to check the fit and look of the tiles. This step is crucial for visualizing the outcome and making necessary adjustments.
- Time Management: Allocate sufficient time for the project. Rushing through tile installation can lead to mistakes and a subpar finish.
Getting ready is essential before setting on install ceramic tile. It makes installing easier and ensures the end result meets what you hope for in use and style. In the next section, you will see a step-by-step guide for install ceramic tile. In this process, you have the first step, layout planning, until the last step (the sixth), which allows the mortar to set.
3. Step-by-Step Guide: Tile Installation

- Plan the Layout: Start the process by planning your tile layout. you can use se manual chalk lines or Laser level to mark the starting point of the layout, ensuring it’s square to the room.
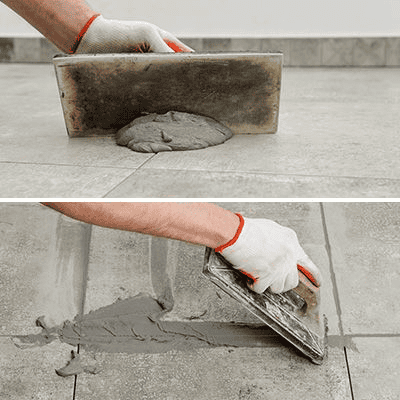
- Application of Mortar: The next step is to spread the thin-set mortar on the floor using a notched trowel. Make sure to work in smaller sections so that the mortar does not dry out.
- Laying the Tiles: Now place the tiles into the thin-set mortar. Use tile spacers to maintain uniform gaps while laying the tiles. You can either pic a corner or start from the center and work your way out.
- Time to Cut the tiles: Before cutting the tiles, make sure to wear a safety gear. Measure and mark tiles that need to be cut to fit edges or corners. Use a tile cutter or wet saw for precise cuts.
- Check the Alignment: While laying the tiles, make sure to periodically check the alignment. Adjust tiles as needed while the mortar is still wet.
- Wait for Mortar to Set: Now is the time to let the mortar dry as per the manufacturer’s instructions before adding in the grout.
This process covers the critical steps in laying tiles. The idea is to focus on accuracy and precision. Remember, patience and attention to detail are vital for that perfect finish.
4. Cost Considerations in Ceramic Tile Installation
Several factors influence the cost of installation for Ceramic tiles, each contributing to the overall expense of the project:
- Selecting the right Tile: Ceramic tiles come in a wide price range. While a regular 2′ x 1′ tile might be cheaper, a handmade tile or a textured tile can be quite expensive. The type of ceramic tile chosen has a significant impact on the cost.
- Custom Design: Custom designs which use unique and creative patterns, layouts, or spaces with numerous cuts and angles tend to increase the labour time and cost involved.
- Preparing the Surface : Preparing the surface for tile installation, including levelling and cleaning, further adds to the cost. Sometimes the subfloor requires repair
- Labour Rates: The cost of installation will vary depending on the region and the expertise of the installer. On an average the cost of installation is charged per square foot. Typically the cost of labour is about half of the total cost involved in this process.
- Cost of Material: Costs for mortar, grout, and backing materials are also factored into the overall price.
On average, the installation cost for ceramic tiles varies per square foot, based on the above factors. It’s wise to get a few estimates to understand the total cost for your specific installation needs.
5.Grouting and Sealing
Discussed below are the important steps to know how to use grout for a durable and aesthetically pleasing finish:
- Mixing the Grout: Start by Choosing a grout color to complement your tiles. Mix the grout according to manufacturer instructions to achieve the appropriate consistency.
- Applying the Grout: Use a rubber float to apply the grout at a 45-degree angle, make sure to fill all joints evenly. As you go along, remove the excess grout from the surface of the tile.
- Allow the time to Cure: After the grout has been applied, you need to allow enough time for it to set. Usually the time required for the grout to set as specified by the manufacturer, is about 24 hours.
- Sealing the Grout: Apply a grout sealant after the curing process is completed. This prevents staining and moisture absorption. This is particularly important in areas that deal with high-moisture like bathrooms.
- Sealing the Tiles: In case of unglazed tiles, application of a penetrating sealer is a must to protect them from stains and moisture.
To ensure a lasting finish, the grout lines must be clean and even. The sealant should be applied thoroughly. Regular maintenance will keep the grout and sealant effective over time.
6.Maintenance and Care: Easy Tips for Your Ceramic Tiles
Maintenance and care of ceramic tiles is important to ensure their longevity and aesthetic appeal:
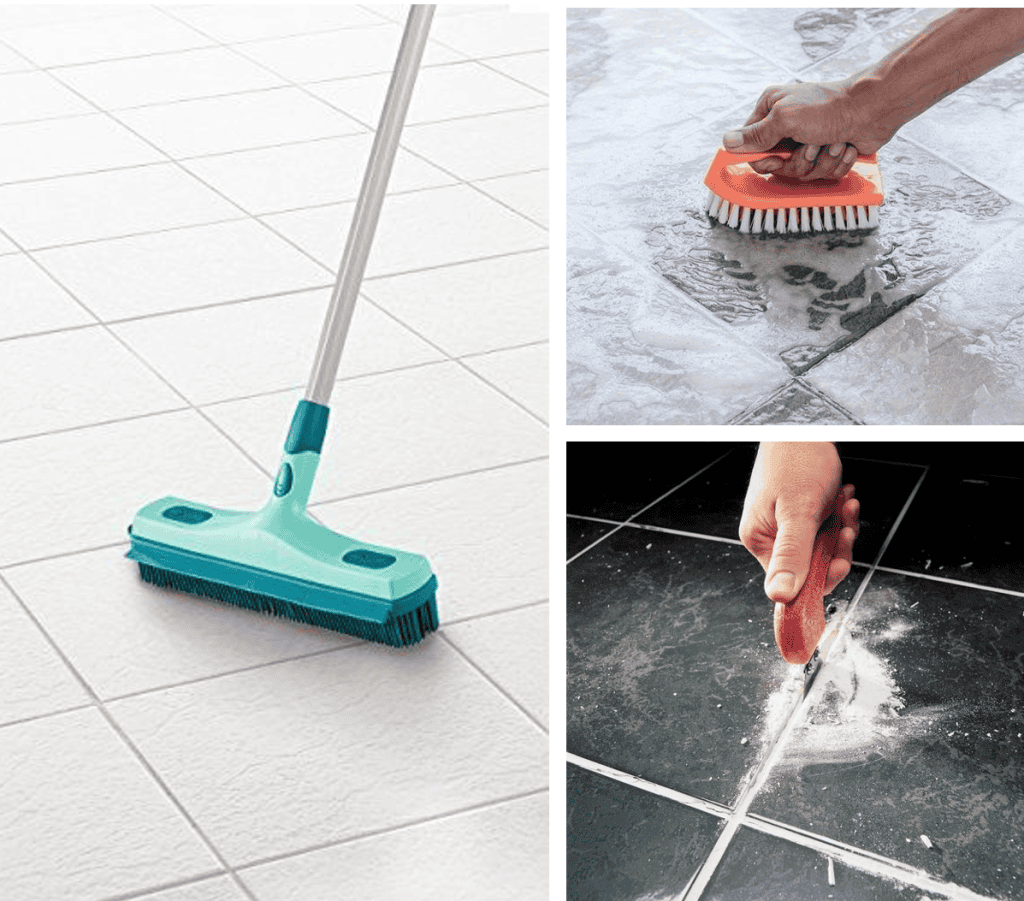
- Regular Cleaning: Sweep or vacuum regularly to remove dirt. Use a mild detergent and warm water, For mopping. Avoid harsh chemicals that can damage the tile surface.
- Stain Removal: Promptly tackle spills to prevent staining. For tougher stains, use a gentle tile cleaner and avoid abrasive tools.
- Grout Maintenance: Clean grout lines periodically to prevent discoloration. Using a sealer can protect grout from moisture and dirt.
- Avoiding Damage: Protect the surface of the tiles from scratches by using furniture pads. Avoid dropping heavy objects on the tiles.
- Repairing Damaged Tiles: If there is a cracks or chip on the tile, it’s generally best to replace it. Ideally store some extra tiles from the initial installation for such repairs.
Regular upkeep and proper attention to the tiles will keep your ceramic tiles looking pristine and extend their lifespan.
7.Common Mistakes to Avoid
In DIY ceramic tile installation, several common errors can crop up:
- Inadequate Surface Preparation: Not cleaning or levelling the floor efficiently prior to installation can lead to uneven tile placement.
- Incorrect Mortar Mix: Using mortar that is too wet or dry affects tile adhesion.
- Inconsistent Tile Spacing: Failing to use spacers can result in uneven gaps between tiles.
- Rushing the Process: Give sufficient tile for the mortar or grout to set, to ensure proper installation.
- Improper Sealing: Not sealing the grout properly, especially in high-moisture areas, can lead to water damage and mould growth.
Avoiding these errors involves careful preparation, following manufacturer instructions, and ensuring each step is done correctly.
8. Advanced Tips for Professionals
how to Install Ceramic Tile For professional ceramic tile installers, advanced techniques and staying abreast of industry trends are crucial:
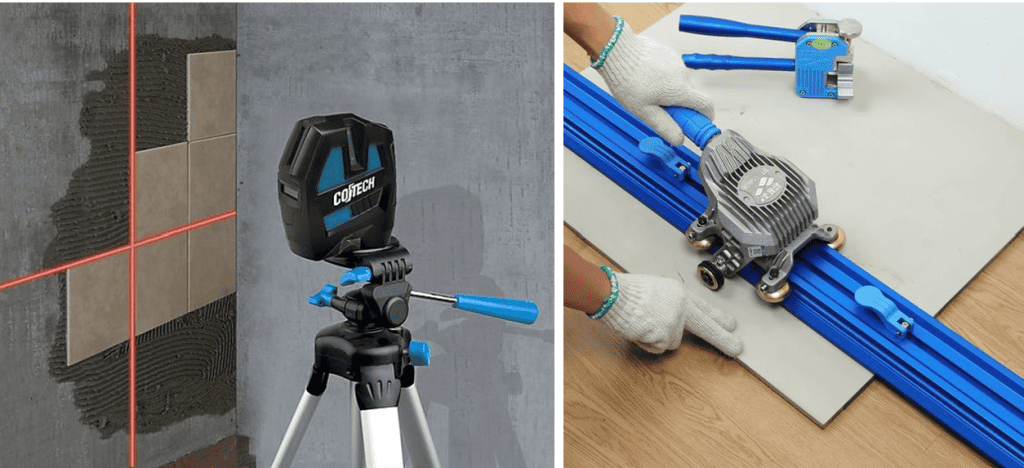
- Laser Leveling for Precision: Laser levels can be used for perfect alignment and symmetry in tile layout.
- Use of Innovative Cutting Tools: Stay updated with the latest technology in the tile industry, exploring new cutters for intricate and efficient cuts.
- Advanced Mortar Techniques: Experiment with new mortar types offering better adhesion, elasticity and flexibility.
- Design Trends: Keep up to date with the new design trends, like large format tiles, penny tiles and various tile combinations and unique patterns.
- Eco-Friendly Materials: Incorporate sustainable materials and practices in your installations.
Staying informed about the latest tools and trends ensures a professional edge in the competitive tiling industry.
If you like to learn more about our products and services, please click here
Conclusion
Installing ceramic tiles is a rewarding process that enhances any space. This guide covered crucial steps from preparation and tile laying to grouting and sealing, offering insights into costs and maintenance. For DIY enthusiasts, patience, precision, and proper planning are critical to a successful installation. Whether you’re a beginner or a seasoned pro, every project offers a chance to hone your skills and add personal touches to your home. Embrace the challenge and take pride in creating beautiful, durable tiled surfaces.